Tribological Testing: SRV, 4 Ball Methods and Profilometer
Tribological Testing by SRV®
In an earlier edition of the LubeLetter, the concept of Tribology was discussed and its application to the properties of friction and wear. At Nye Lubricants, friction and wear is measured using an SRV instrument. SRV stands for Schwingung (Oscillating), Reibung (Friction), Verschleiß (Wear).
The SRV measures the physical interactions between a lubricant and two specimens in a loaded contact in either rotational or linear oscillatory motion. The upper specimen oscillates in a linear path on the lower stationary specimen at a specified frequency, stroke length, load, temperature, and test duration. The frictional force imparted to the lower specimen is measured continually and the coefficient of friction (COF) is automatically calculated and recorded throughout the test. If both specimens are metallic, the electrical resistance between the two can be measured as an indication of the film strength of the lubricant. After testing, the specimens can be examined under a microscope and the wear scars measured. Nonmetallic specimen including various plastics and ceramic materials can also be tested on the SRV.
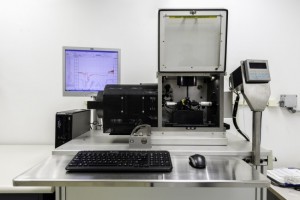 Two ASTM test methods associated with the SRV include ASTM D5706 & D5707. ASTM D5706 is used to measure the extreme pressure (EP) capacity of a lubricant. The test load is increased every 2 minutes until the specimens weld together, indicating lubricant failure. ASTM D5707 is a COF & wear test method that is run for a fixed time at a moderate load and the COF and specimen wear scars are reported. This method is similar to the well-known ASTM D4172 Four Ball Wear test method.
The SRV Test System also has a rotational mode in which a stationary upper specimen (pin, ball, etc.) is in contact with a rotating disc. ASTM G99 is used to measure friction and wear characteristics of lubricated specimens in rotational mode. Nye has also created rotational fixtures which allow for the testing of thrust loaded ball or roller bearings. One of the rotational bearing tests developed by Nye measures the total life of a highly stressed lubricated bearing. A second test has been developed to measure the dynamic electrical properties of a conductive grease.
The SRV is a very versatile instruments and Nye engineers are often able to customize testing to best simulate your specific need. Please contact your Regional Engineering Manager to discuss your specific requirements.
Tribological Testing by 4 Ball Methods
In the last issue, we described how tribological properties of a lubricant can be measured using the SRV. This issue covers other methods for determining tribological characteristic of a lubricating grease, using two ASTM test methods, the 4-Ball EP Tester and 4 Ball Wear. The 4 Ball EP Tester focuses on Extreme pressure (EP) properties and the 4 Ball Wear focuses on wear scar (WS), and coefficient of friction (COF).
4 Ball Extreme-Pressure
The measurement of Extreme-Pressure properties of a lubricating grease using the 4 Ball method is designated under the ASTM-D 2596. The purpose of this testing is to determine the load carrying capabilities of a lubricating grease under high load applications.
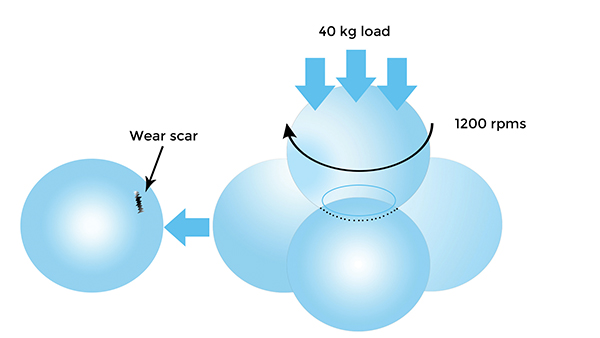
The 4 Ball EP test machine operates in a sliding or rolling motion. A single stainless steel ball rotates onto three stainless balls, all of which are completely coated with a lubricant film, or “boundary”, held stationary in the form of a cradle.
The ability of a grease to perform under extreme pressure conditions is determined by the load wear index (LWI). Three measurements go into determining the LWI. Imagine the test as a routine traffic light. The first measurement, the last non-seizure load (LNSL), is the highest applied load that exists when there is still lubrication between the 4 balls, or the “green light”. The load is then increased until the lubricant film no longer exists and there is metal to metal contact and the 2nd measurement, seizure region, occurs, or the “yellow light”. Finally the load is increased until catastrophic welding occurs, and the final measurement is determined, or the “red light”. Welding can be detected if any of the following are noticed:
• The friction-measuring device undergoes a sharp transverse movement
• Increased noise level of the motor
• Smoking from the ball pot
• A sudden drop in the lever arm
• An average ball scar over 4mm is recorded
Using the values of these parameters, the Load-Wear Index can be calculated, which gives a numerical value to compare a grease’s ability to prevent wear at applied loads. Based on this value, one can formulate greases with different levels of extreme pressure properties.
4 Ball Wear
Wear scar properties and coefficient of friction of a lubricating grease can also be determined using the 4 Ball Wear configuration. The purpose of this test is to determine the wear preventive characteristics of a lubricant. In the 4-Ball Wear test, a steel ball is rotated against three lubricated stationary steel balls under a specified load, speed, temperature and time, per ASTM D-2266 (grease) or ASTM D-4172 (oils). The better the lubricant is at preventing wear, the smaller the wear scar will be on the three stationary balls. At the conclusion of the test, the three wear scars are measured and the average is reported. The coefficient of friction is also measured throughout the 60 minute test with the average being reported at the end of the test.
![]()
4-Ball data is useful to differentiate between lubricating greases having different levels of load bearing capabilities, wear protection and friction reduction. Although these results do not necessarily correlate with real life applications, the method has become an industry standard in comparing EP, wear and frictional functionality.
In the next issue, we will describe how wear scars from the various tribological tests are measured two dimensionally using optical microscopes and three dimensionally using profilometry.
Tribological Testing by Profilometer
In previous editions of the LubeLetter, we described the importance of Tribology; the science of friction, wear and lubrication; and how the tribological properties of a lubricant can be measured. This issue takes a closer look into the measurement of one of those key properties, the wear scars generated by the 4-Ball Wear and SRV tests.
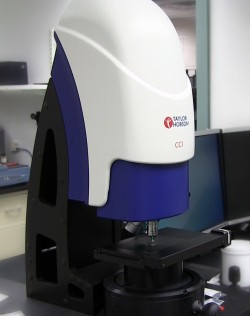 Wear scars are typically reported based upon a two-dimensional measurement of scar length and width using an optical microscope. The better the lubricant is at preventing wear, the smaller the wear scar will be. For the 4-Ball Wear method, the result is reported as an average of six measurements of the size of the scar in millimeters, averaging the width and length of the scars on each of the three stationary balls used in the test. The same concept applies to the measurement of the scars generated by the SRV tests. However, unlike the 4-Ball Wear which only uses stationary balls, the SRV is not limited to a specific test specimen. Because the SRV tests can also be performed using a variety of materials, the wear scar measurements can be used to differentiate performance for an application’s specific materials, whether they are metallic or non-metallic.
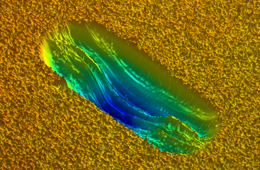
But scientists and engineers at Nye believe that there is more to a scar than meets the eye when measuring a two-dimensional scar. A smaller scar may lead one to believe the lubricant performance is better, but is the scar really smaller? Well, that depends on how you look at it. Two lubricants could yield the same wear scar result, but looking at a third dimension by measuring the depth of the scar can be used to better distinguish the performance of one lubricant from another.
![]()
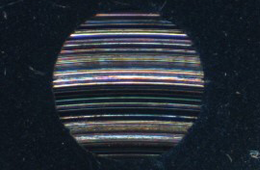
At Nye, our laboratory scientists use an optical Profilometer to measure this third dimension of a scar. By including depth, the volume of the wear scar can be determined providing a thorough wear scar analysis. Additionally, the Profilometer can be used to measure a material’s surface roughness. The image on the left is a 2-dimensional scar and the image on the right is 3-dimensional scar.
These measurements together; wear scar, scar depth and surface roughness; can be used by Nye engineers to select the best lubricant formulation for your application. Please contact your Regional Engineering Manager to discuss your specific requirements.
